This post contains affiliate links and I will be compensated if you make a purchase after clicking on my links.
Do you have drawer of old t-shirts? So do I. I also have two boys who are starting school one had an art smock on his supply list. He really didn’t like the plastic one I pulled out of the art bin in the basement. To be honest, I didn’t either. So I got to thinking, what could I use for a art smock that I won’t have to go out and buy? It’s just going to get paint and whatever else all over it. I can upcycle a t-shirt and make it work as an art smock.
This craft is so super easy, truely, it only took me about 5 minutes from start to finish. Keep in mind this is an art smock, it needs to be functional. It will get messy when used by a 4 year old and a paintbrush.
Step one is easy, find an old adult t-shirt. Open your dresser and peek inside, I’m sure you have something you can part with. Just maybe not that concert t-shirt from 1995, that one has sentimental value. I have a bunch of random t-shirts from past fundraising walks, so that’s what I grabbed. This was one that raised money for our kid’s day care. 
Start your timers, 5 minute craft ahead
Next you need a scissors or a rotary cutter. Flip your shirt over and cut approximately 2 inches to either side of the tag. (Yes that scissor’s says “Mom’s only,” pretty much means DO NOT TOUCH. This scissors is mine and for fabric only.) You want to continue those cuts all the way to the bottom of the shirt. 
Now take that approximately 4 inch section of shirt and cut it in half lengthwise. These will be your ties on the back of the art smock. Okay you are about 1 minute into this craft, how’s everyone holding up. I hope doing just fine, this is simple pimple. Cut off the collar area of the shirt all the way around, this prevents it from getting too tight on your little’s neck.
Next fold over your ties and pin to the back of the shirt about 2 inches from the top after you cut off the collar. Yes I am giving you measurements, but I pretty much eyeballed this whole craft. I am going to remind you again, this is an art smock, not a princess gown.
Check out our Great Fall Crafts
I draped mine over the office chair to make sure they were lining up and seemed to be at the right height. Head on over to your trusted sewing machine. Do you keep yours with thread already loaded in and ready to go. I do, that may not be good for the machine, but that’s how I roll. Anyway….I used a zig-zag stitch and went over the edges a few times. Remember this will need some reinforcing if you want it to last. My two boys enjoy seeing how long a new item of clothing will stand up to light saber fights, car wrecks and general chaos.
See isn’t that just the fanciest of office chairs? The art smock is done, now can I find my model to try on the new attire.
Easiest DIY Art Smock
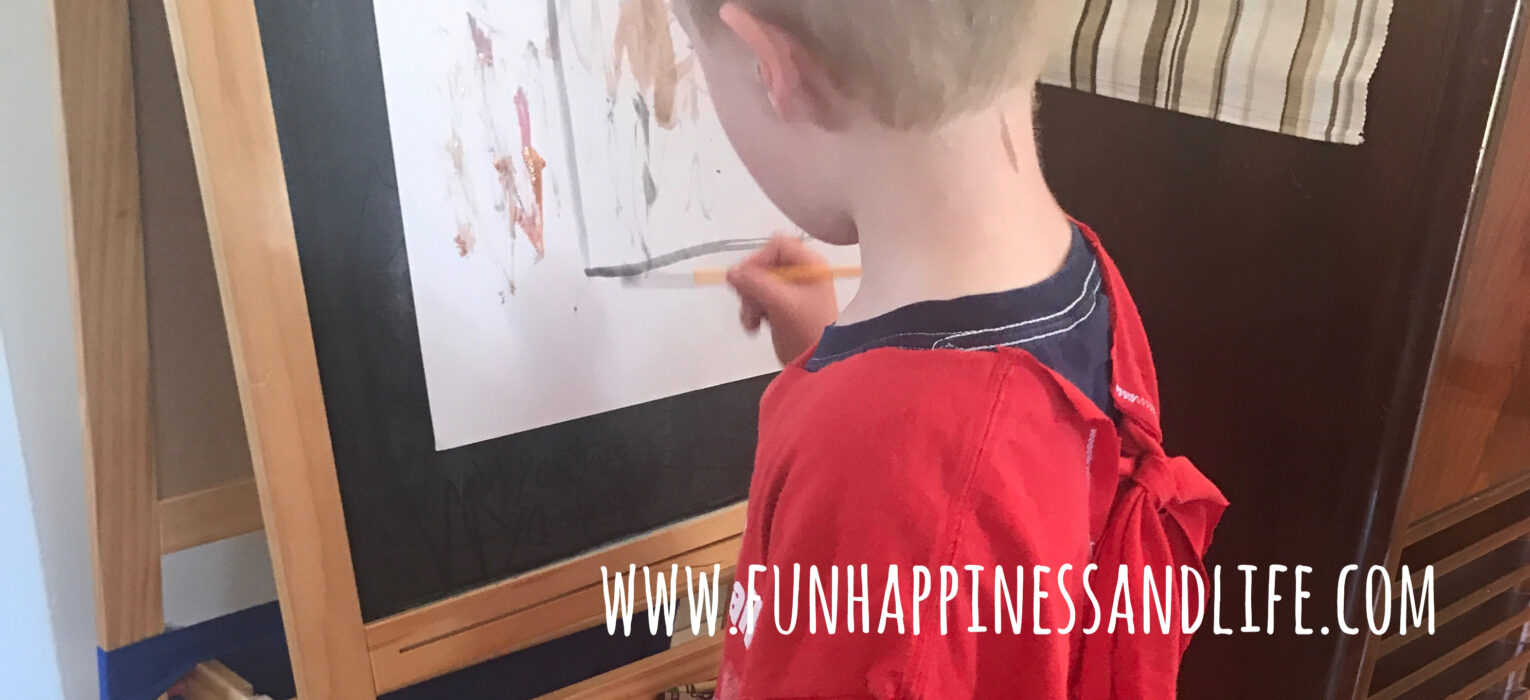
Big-C my 4 year old was home from 4K and gave it a try. The art smock does it’s job. It’s not too long that he is tripping over it. It’s not so short that it defeats the purpose of wearing an art smock. The short sleeve adult shirt works well on little arms and allows for full movement. That horrible plastic art smock was crunchy when you moved. 
This Make It Monday project was so easy. Truly only took 5 minutes to complete (since my sewing machine was already set up). Thankful that I didn’t have to make any purchases and was a great way to upcycle an old t-shirt. Big-C was so comfortable in the shirt, he continued to wear it after the painting activity was over.