This post contains affiliate links and I will be compensated if you make a purchase after clicking on my links.
 I love my little kitchen with it’s eating corner. When we first moved in it was this drab color where the walls matched the cabinets matched the counters. We knew we weren’t going to change the cabinets or the counters but we could definitely do something about the walls.
We are not afraid of color on our walls, enter Mr. P spending a weekend painting. We love how the color improved the space. It’s a nice kitchen green which works well with the counter and cabinets.
About a year after we moved in we found this awesome table that fits in with the age and size of the house and we found some chairs, but they weren’t quite shipshape. Then life happened and instead of fixing the chairs we’ve made due and had children instead.
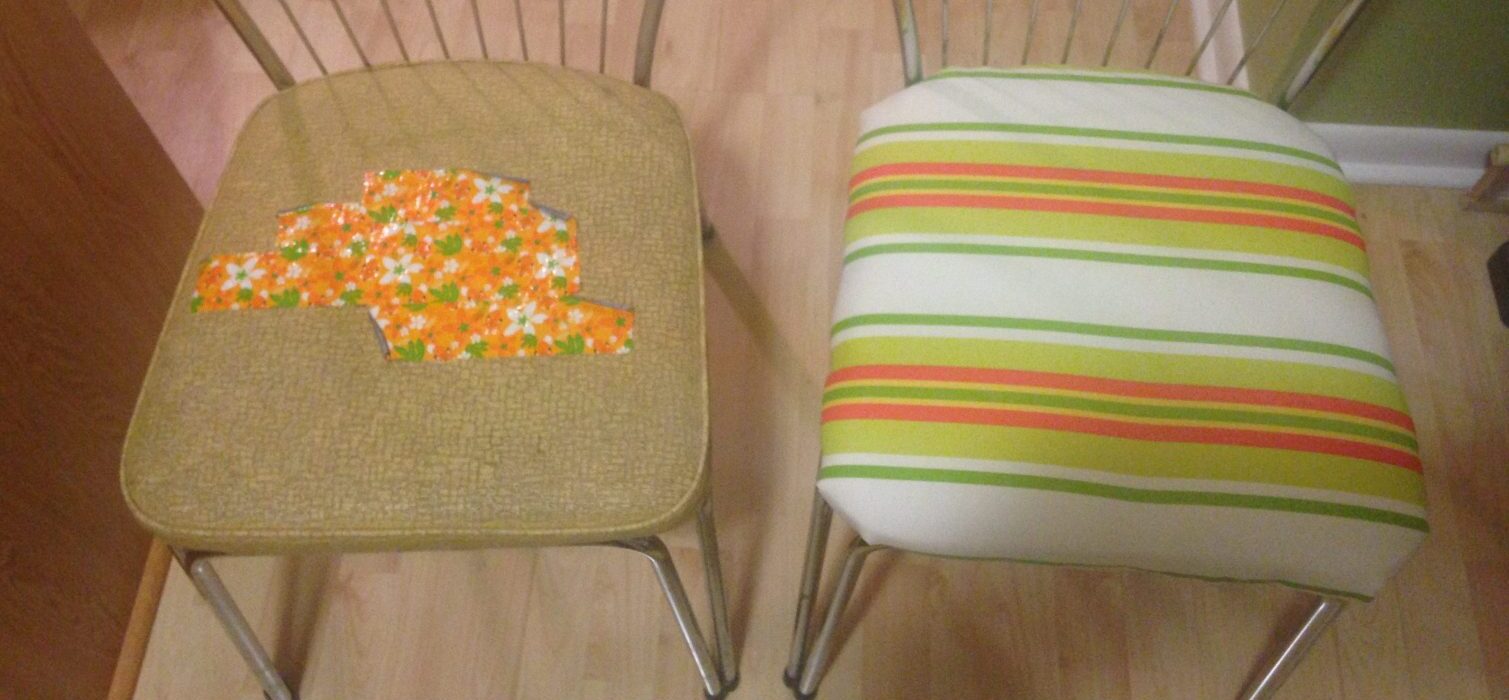
A few months ago one of the cushions sprang a large whole and we “fixed” it with duct tape. We finally set out to buy material to cover the seats. We decided on outdoor material due to it’s durability. Well then Thanksgiving and Christmas happened.
Finally I had enough and decided today would be the day to cover the cushions. Here’s the step by step. We will most likely upgrade at some point so I wasn’t going to make brand new cushions. We just wanted to cover up to improve the look.
ONto the Project
- Assemble your materials and move all the Hot Wheels and Paw Patrol off the work surface. Outdoor material, padding, staple gun, screwdriver, cutting implements of choice.


2. Remove the cushion from the chair. Simple pimple, but don’t lose the screws. It helps to place the chair upside down on top of another chair, saves your back and makes the working surface nice and flat.
3. Place cushion on padding and cut to size, we triple layered it. Roughly stapled to the seat so it wouldn’t move and bunch under the material. I cut off the excess around the corners to avoid an over stuffing look.
4. Size the material on the cushion and make sure the lines/pattern is going the way you want it to go. I started by folding under the material and pulled it taunt then stapled along the edge. I used 5/8″ staples so that they adhere and go through all the layers to hold tight to the material. Again I trimmed off the corners to avoid having excess material. Then it’s just go around the cushion sides, corners, then tuck and fold to hold it into place. 
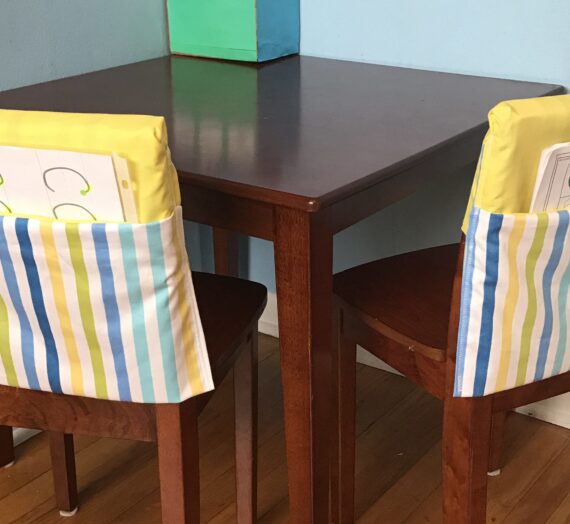
5. Reattach the seat to the chair and compare the difference between the old tired cushion and the new happy seat! I can’t believe I waited so long to do this.  6. Complete all three chairs and take a picture, because you did this with a 3 year old and a 5 year old in the house!
  I cannot believe I waited this long to complete this DIY project. It was much easier than I thought it was going to be. I love how the chairs turned out and D-Man sat on a completed one at dinner tonight and was impressed with the softness. So that’s a win.
moneyCorgi
Nice post
I bought materials to try and redo one of my chairs, but once I got everything home I was too tired to start. Still have an unused staple gun sitting in my spare room somewhere.
Kim Amy
HAHA yes after I bought all of the stuff it just sat there until the huge rip and duct tape patch job! I think we had a family party we were hosting in our home also, so that might have added to my need to fix the chairs!
Helen Gandy
They are so cute, really fab. Thanks for linking up to the #bestandworst
Kim Amy
Thanks, glad you like them.